MiniPOS
Mobile Point of Sale application for Android + iOS with License Management Web dashboard
- Version: v1.0.2
- Created: 6/21/2019 | Last update: 7/8/2022
- Author: TLS Software
- Porfolio: https://codecanyon.net/user/tlssoftware/portfolio
- Website: https://tlssoftwarevn.com | Email: thanhlongsolutions4u@gmail.com
Introduction
Thank you so much for purchasing MiniPOS!
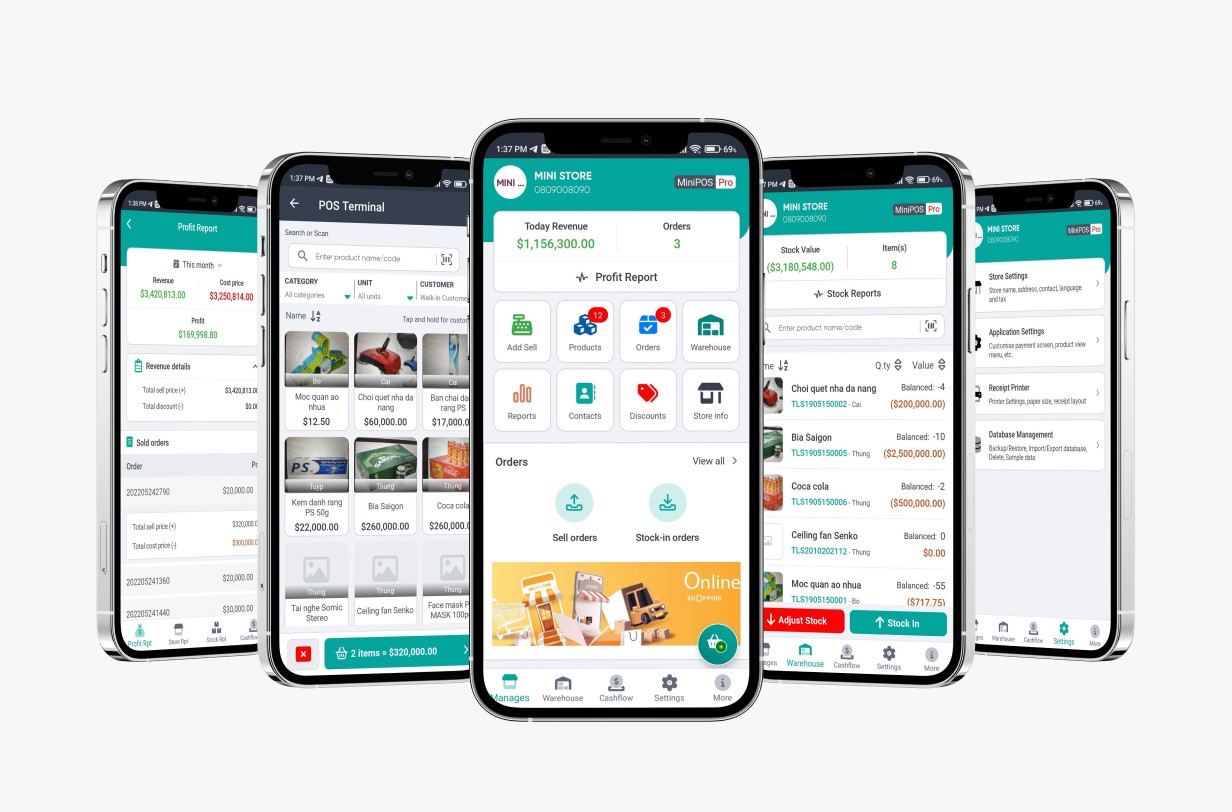
We hope you will find this application is helpful for your next exciting project.MiniPOS is a mobile application that turn your smartphone into a Point of Sales system. It's the easiest way to manage your sales, inventory and customers from your smartphone. This is a completely offline version, all data is saved in your devices using SQLite database.
This documentation aimed to give you a brief instructions so that you can quickly adapt and at least running the application at your local machine.
Please refer to these step by step instructions, in case you could not find any missings or got stuck at any step, kindly reach out to our official channels via Skype or Email for further support.
Happy Coding!
Prerequisites
Framework Installation
1. ASP.NET Core: Download Developer Pack to create new or run, debug existing applications. Download .NET 5.0
2. SQL Server 2016: for database hosting. Download Service Pack 2 for Microsoft® SQL Server® 2016
Installation video guide:
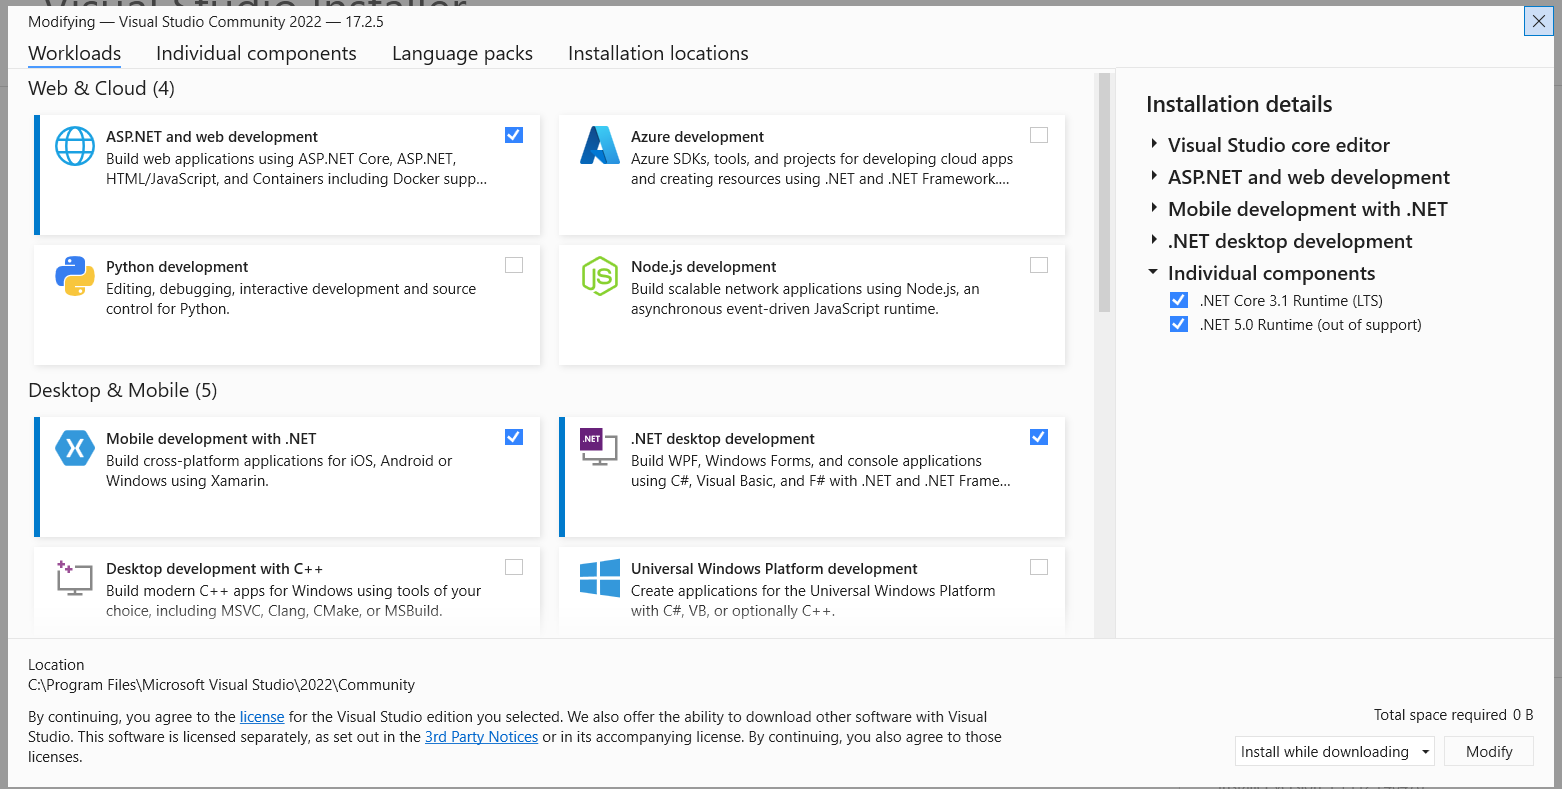
3. Visual Studio 2019 and up (Visual Studio 2022 is recomended): A full-featured integrated development environment (IDE) for Android, iOS, Windows, web, and cloud. Click here to download (with a Community version for free)
Make sure that you selected ASP.NET and web development, Mobile development with .NET and .NET desktop development check boxe as the image bellow :
Installation video guide:
License Management Dashboard Installation
Databases Setup
1. License Database
Go to Database folder from your main extracted folder, select MiniPosLicense.bak file for database restoration steps below:
- Open SQL Server Management Studio, connect to your server
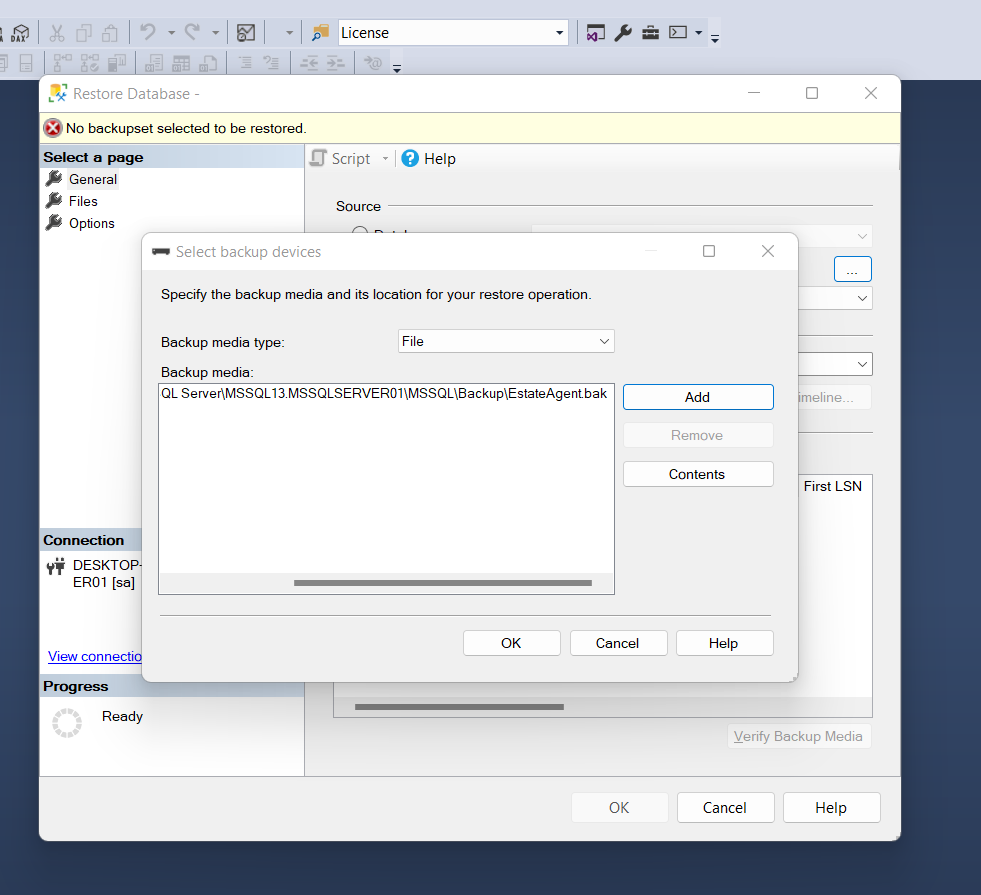
- Right click at Databases section, select Restore Datase
- At Restore Database window, select Device radio checkbox then specify to MiniPosLicense.bak file above by clicking Add button.
- Click OK and wait for the restoration is completed.
2. License Identity Database
Go to Databases folder from your extracted StockManger folder, select MiniPosLicenseIdentity.bak file for database restoration steps below:
- Open SQL Server Management Studio, connect to your server
- Right click at Databases section, select Restore Datase
- At Restore Database window, select Device radio checkbox then specify to MiniPosLicenseIdentity.bak file above by clicking Add button.
- Click OK and wait for the restoration is completed.
Video reference:
Running Web Application
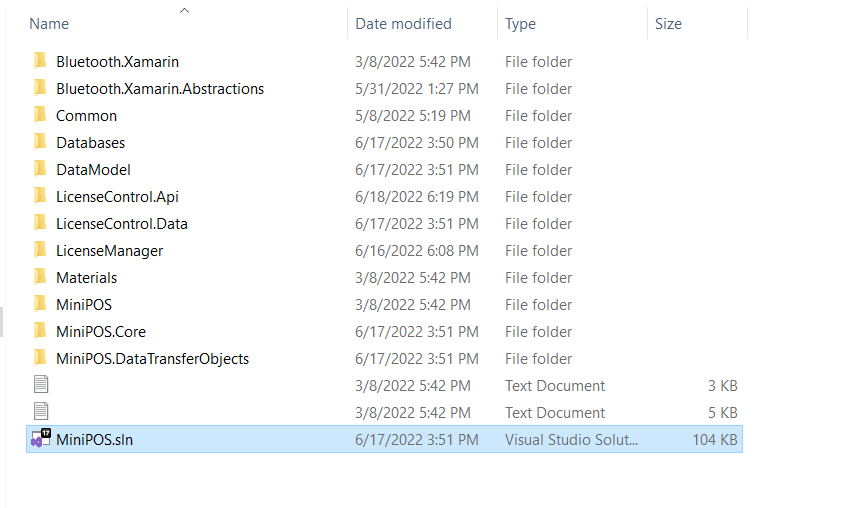
From extracted download folder, you will see the project structure as below:
Let open the MiniPOS.sln using Visual Studio 2019.
Waiting for Visual Studio to completely loading all packages.
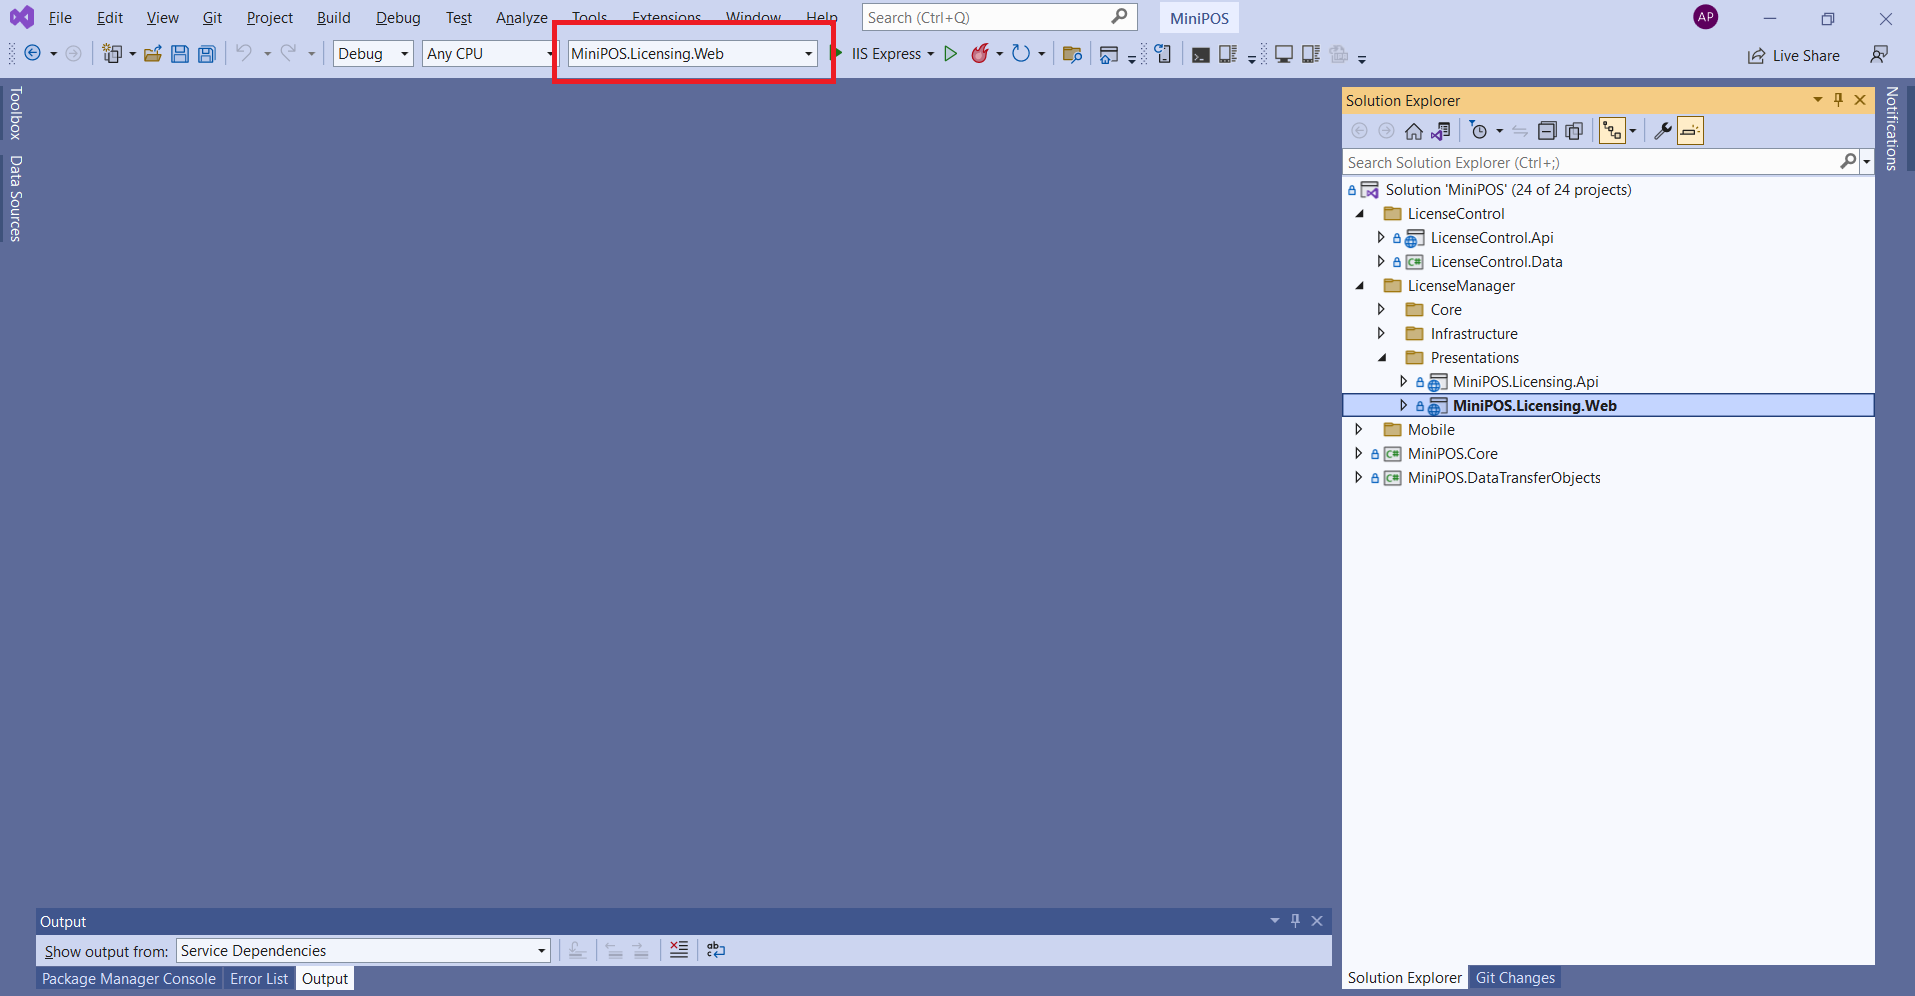
From options box near Debug icon button, select MiniPOS.Licensing.Web to set this project as active (startup project), as below image
Find and open appsettings.json file and make change as follow:
- (Line 19) ConnectionStrings:
                        "ConnectionStrings": {
    "ApplicationConnection": "Server=<your-server>;Database=MiniPosLicense;MultipleActiveResultSets=True;Trusted_Connection=False;User ID=<username>;Password=<password>",
    "IdentityConnection": "Server=<your-server>;Database=MiniPosLicenseIdentity;MultipleActiveResultSets=true;User ID=<username>;Password=<password>"
  },
connectionStrings tag as below:
- Server: your server name
- Database: database name
- user id: your DB username
- password: your DB password
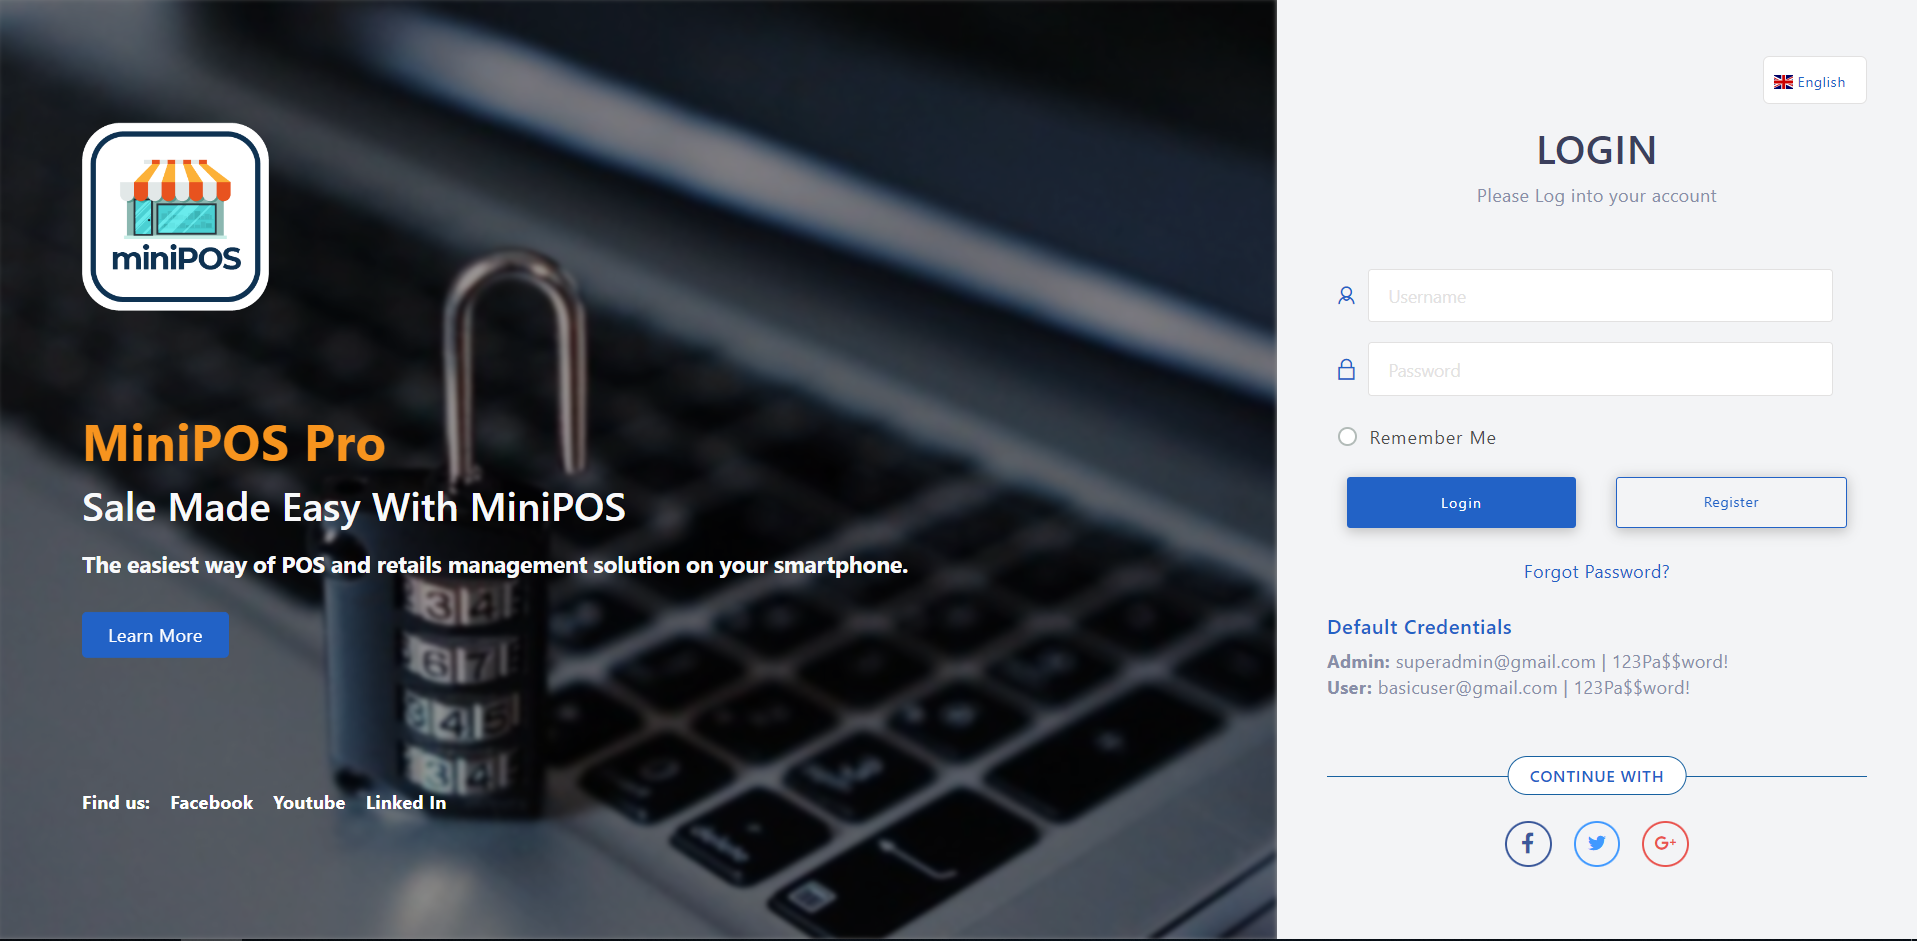
Finally, Press Ctrl + F5 to skip for debugging and running the application. You would see a login screen appear:
License Control Api Installation
License Control API
From extracted download folder, you will see the project structure as below:
Let open the MiniPOS.sln using Visual Studio 2019.
Waiting for Visual Studio to completely loading all packages.
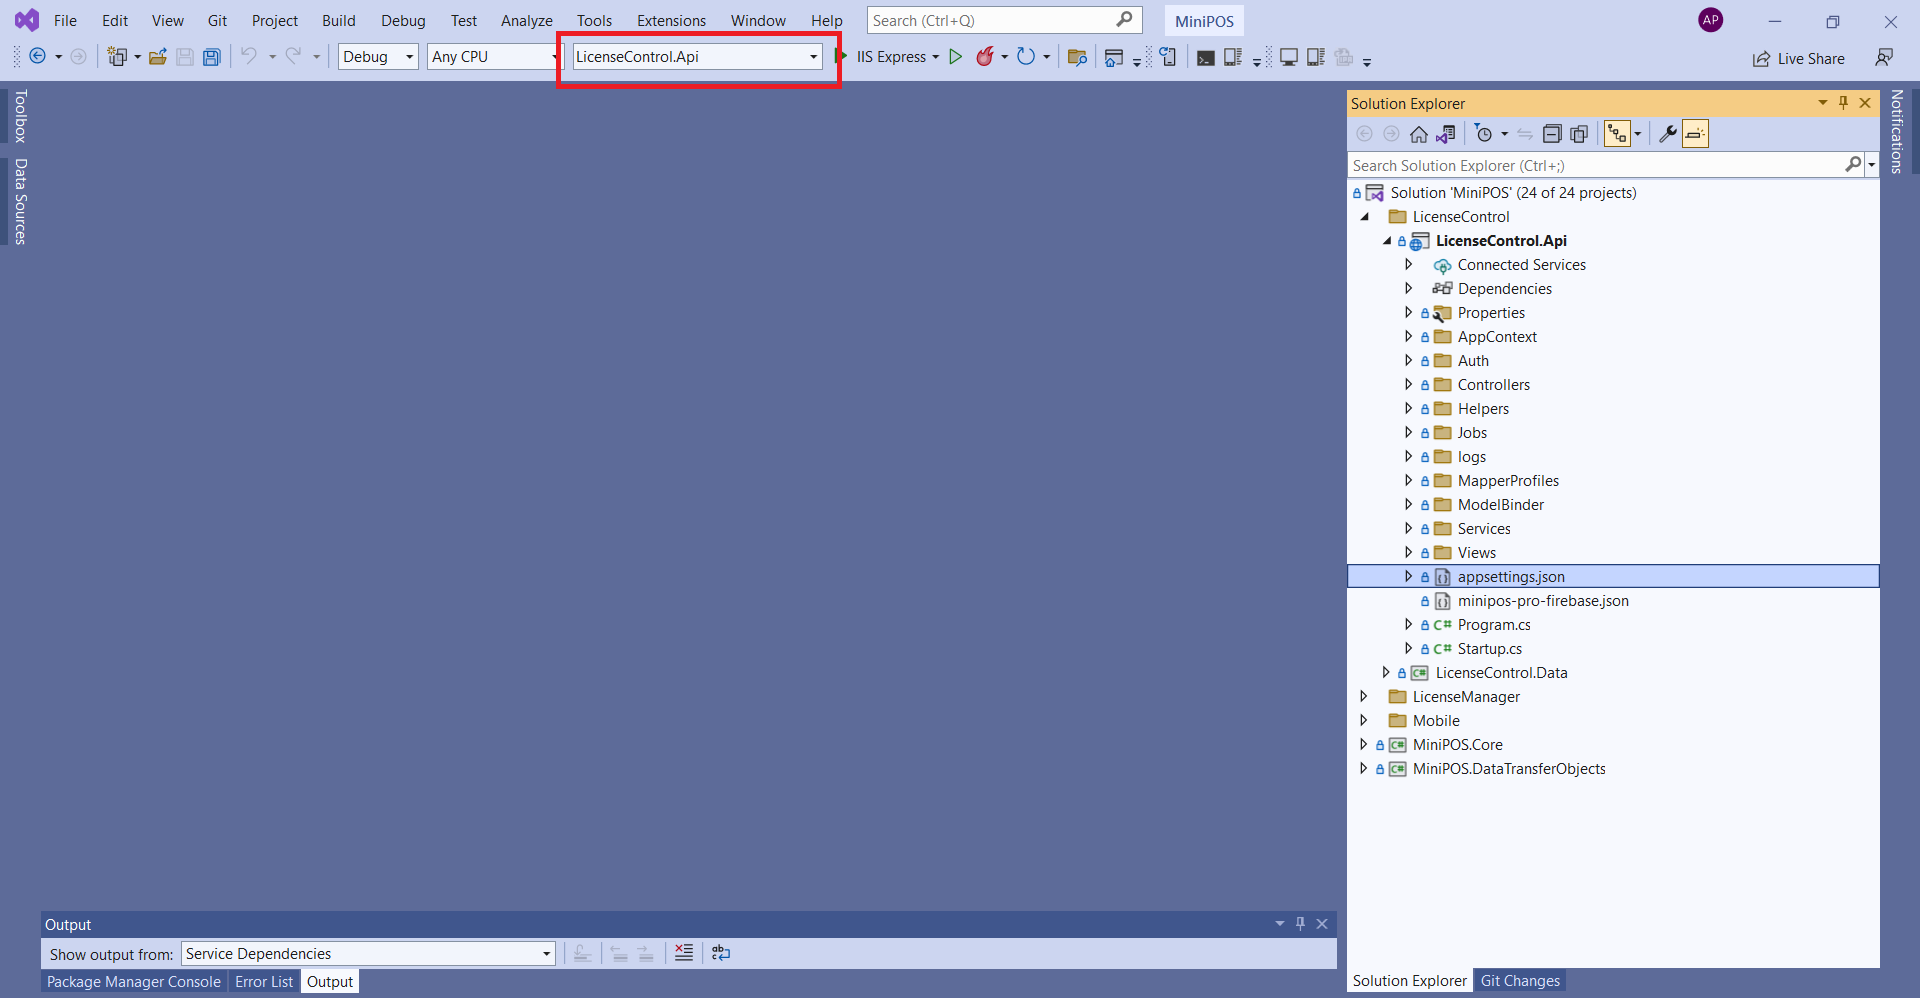
From options box near Debug icon button, select LicenseControl.Api to set this project as active (startup project), as below image
Find and open appsettings.json file and make change as follow:
- ConnectionStrings:
                        {
"ConnectionStrings": {
  "DefaultConnection": "Server=<sql-server-name>;Database=MiniPosLicense;Trusted_Connection=False;user id=<username>;password=<password>"
},
"HostUrl": "http://192.168.1.1:8090",
"Logging": {
  "LogLevel": {
    "Default": "Warning",
    "System": "Information",
    "Microsoft": "Information"
  }
}
}
connectionStrings tag as below:
- Server: your server name
- Database: database name
- user id: your DB username
- password: your DB password
HostUrl: Please change the the default IP http://192.168.1.1:8090 to your local machine IP, change port if any. You can open Command Prompt and run ipconfig to find your machine IP address.
Finally, Press Ctrl + F5 to skip for debugging and running the application.
Important Note
Please take note your MiniPOS License Apis endpoint [http://192.168.1.1:8090] for using in Mobile app connection configuration step.Running Mobile Application
Server Connection
From extracted download folder, open the MiniPOS.sln using Visual Studio 2019 (open as another instance)
Waiting for Visual Studio to completely loading all packages.
From options box near Debug icon button, select MiniPOS.Android to set this project as active (startup project), as below image
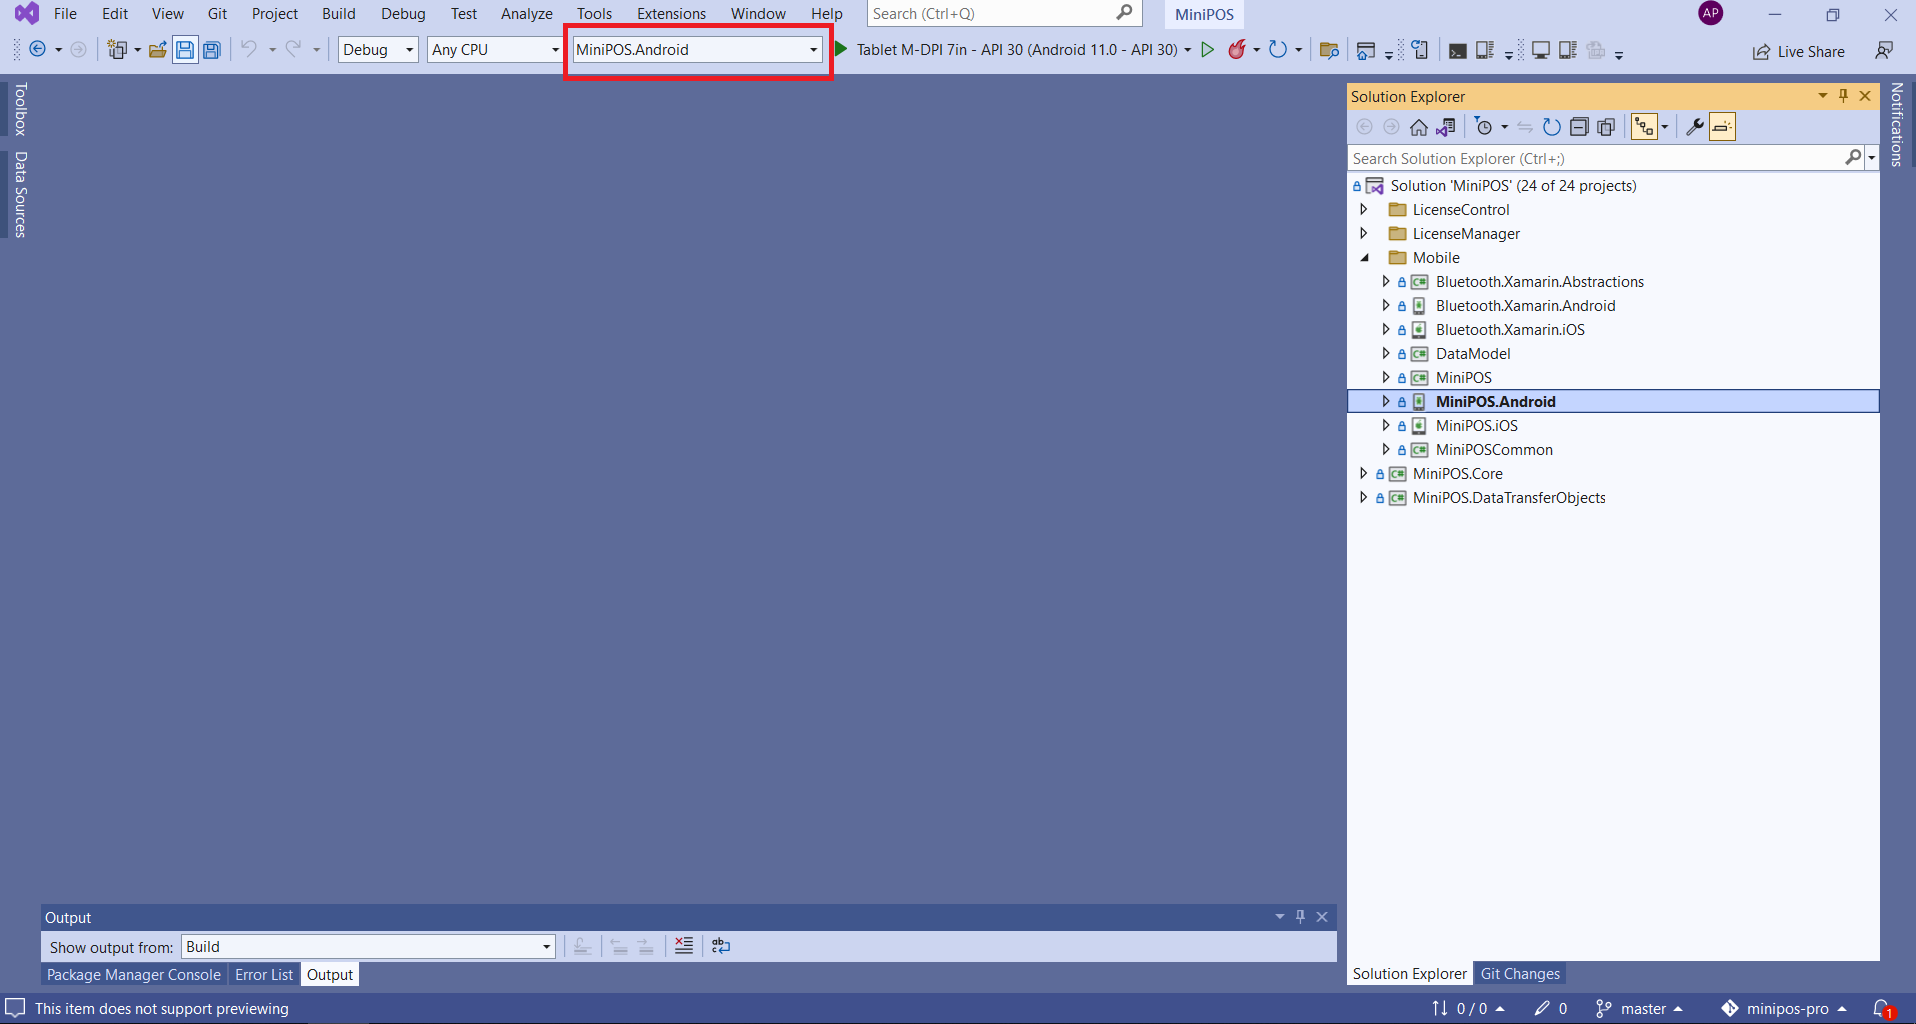
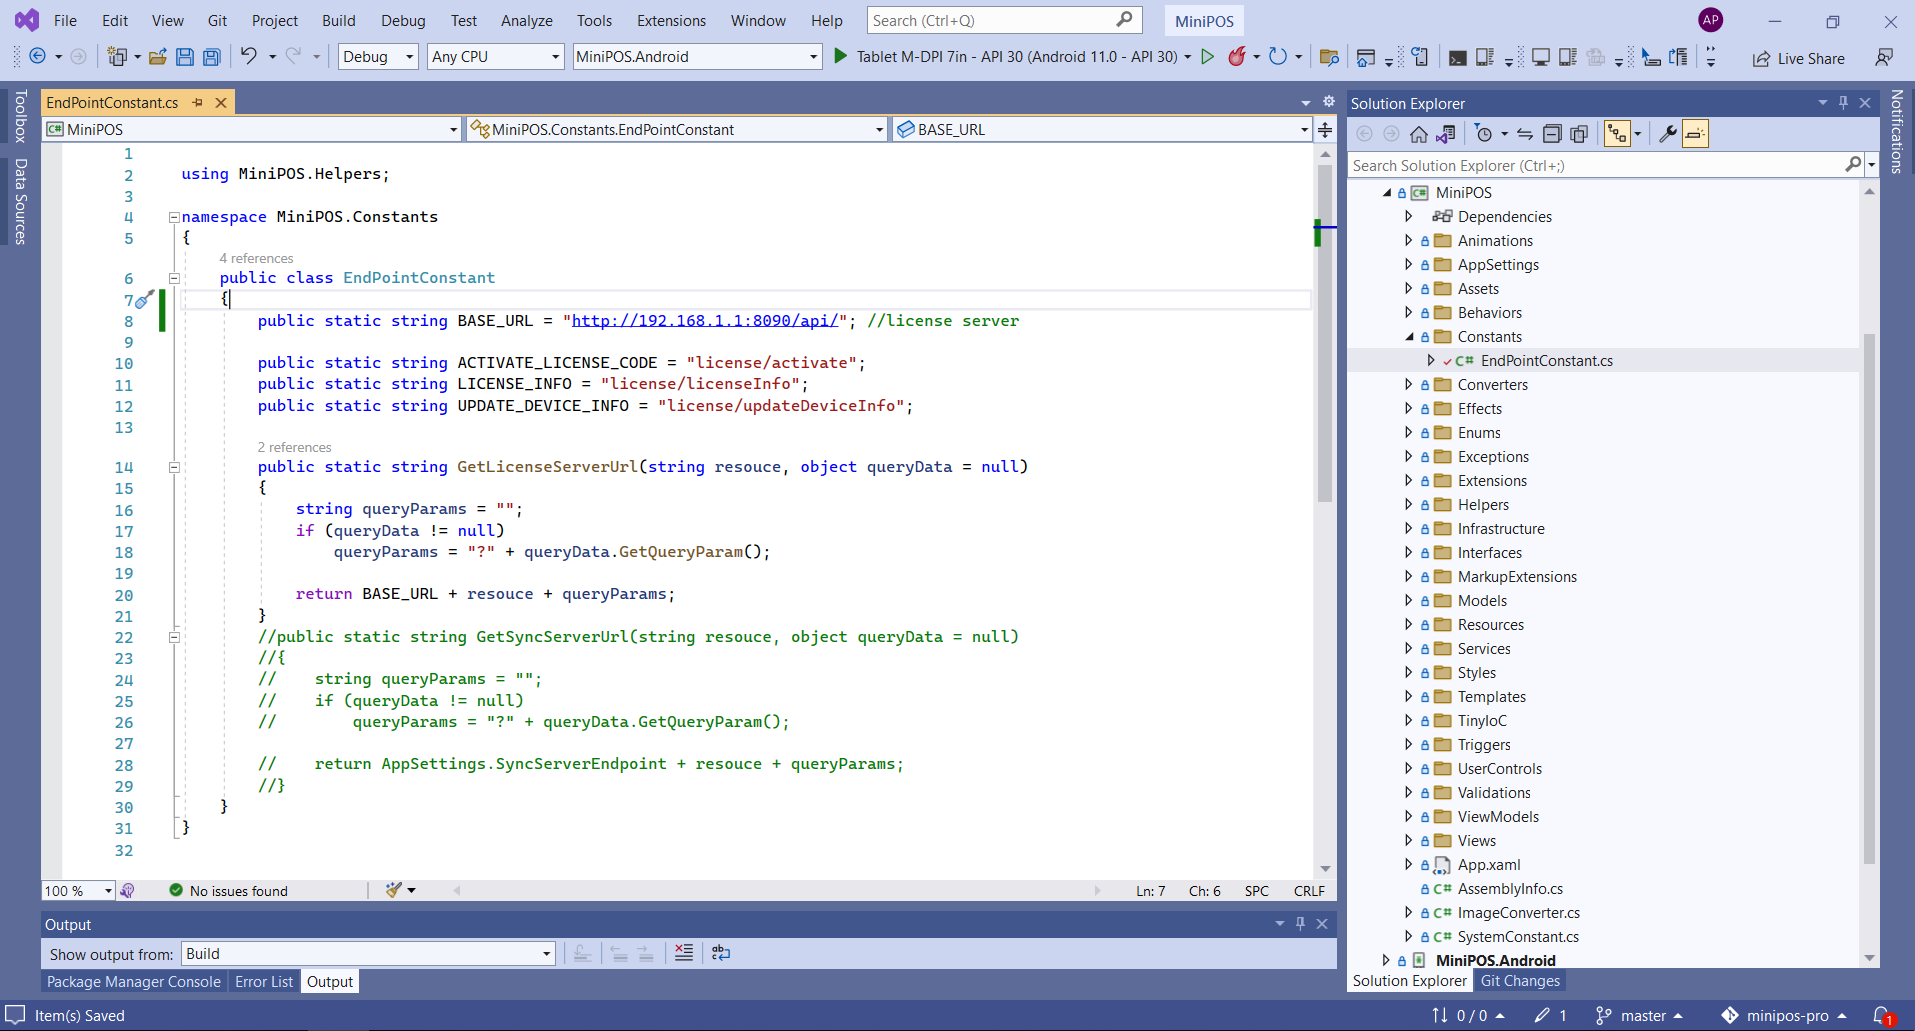
Open MiniPOS > Constant > EndPointConstant.cs file and make change the BASE_URL value to your MiniPOS License Apis endpoint
Running App
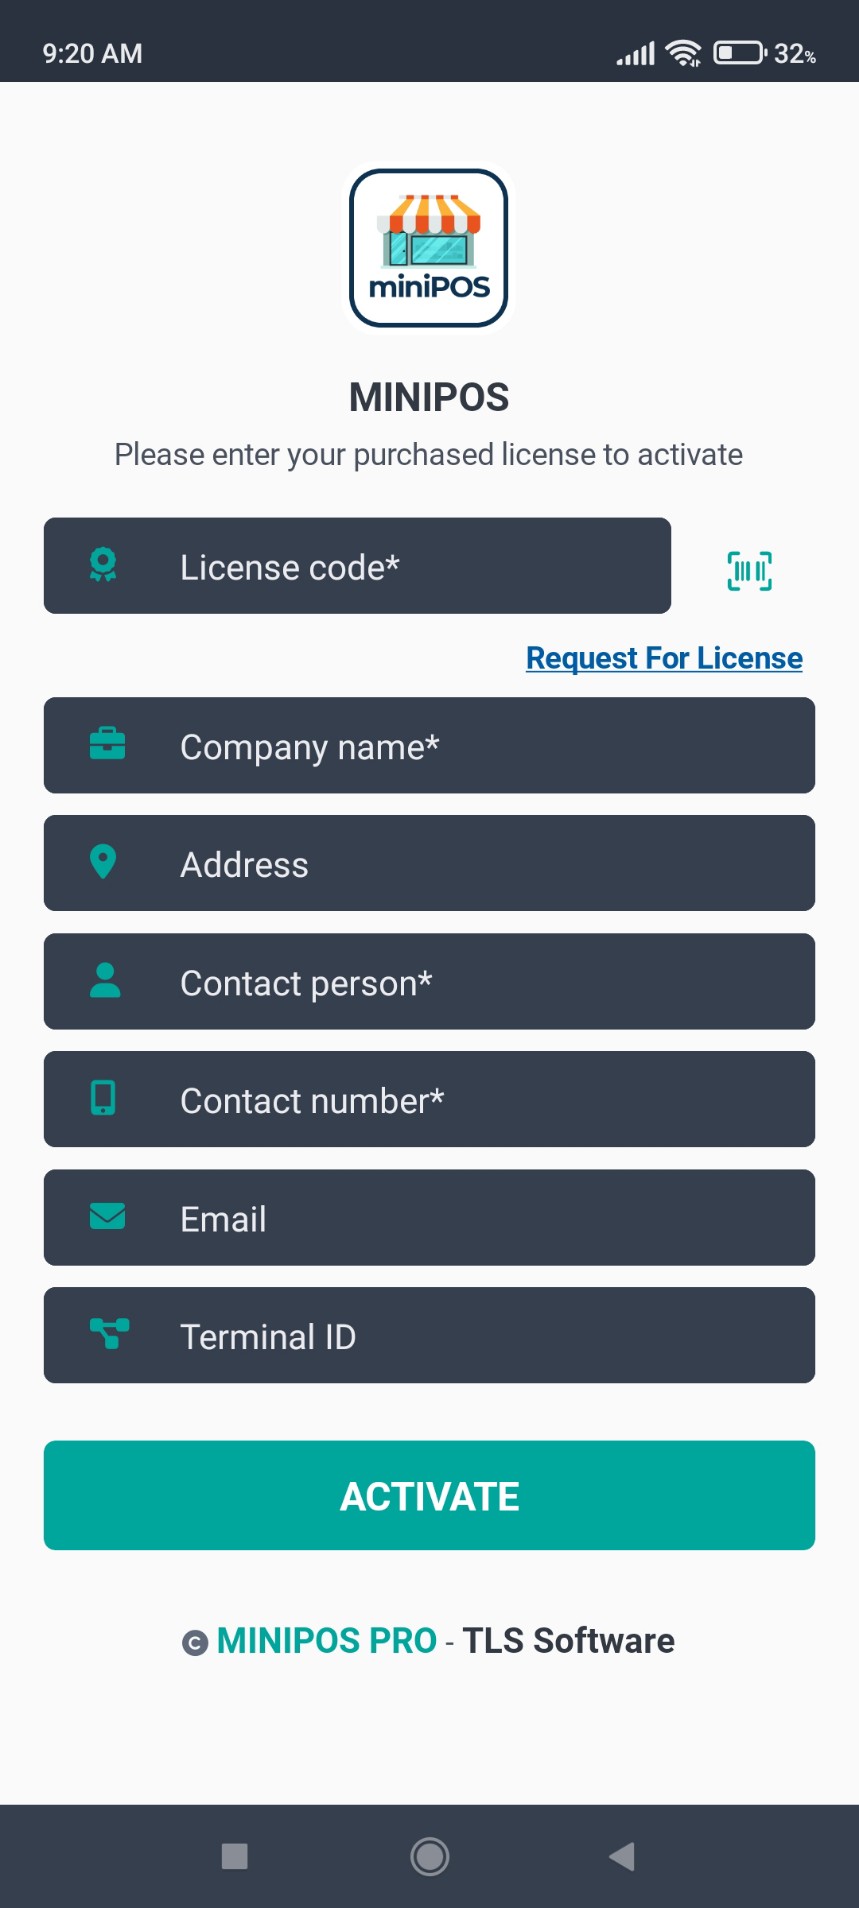
After you finish Server connection step, now hit Ctrl + F5 and waiting until application is launched
At first time launching, an Activation screen will appear requires user to activate the device. Please create a License key from License Management Web Dashboard then Enter the license key to activation code field, fill in another required fields, tap Activate button to register the license.
Reskin App
Change Colors, Theme and Fonts
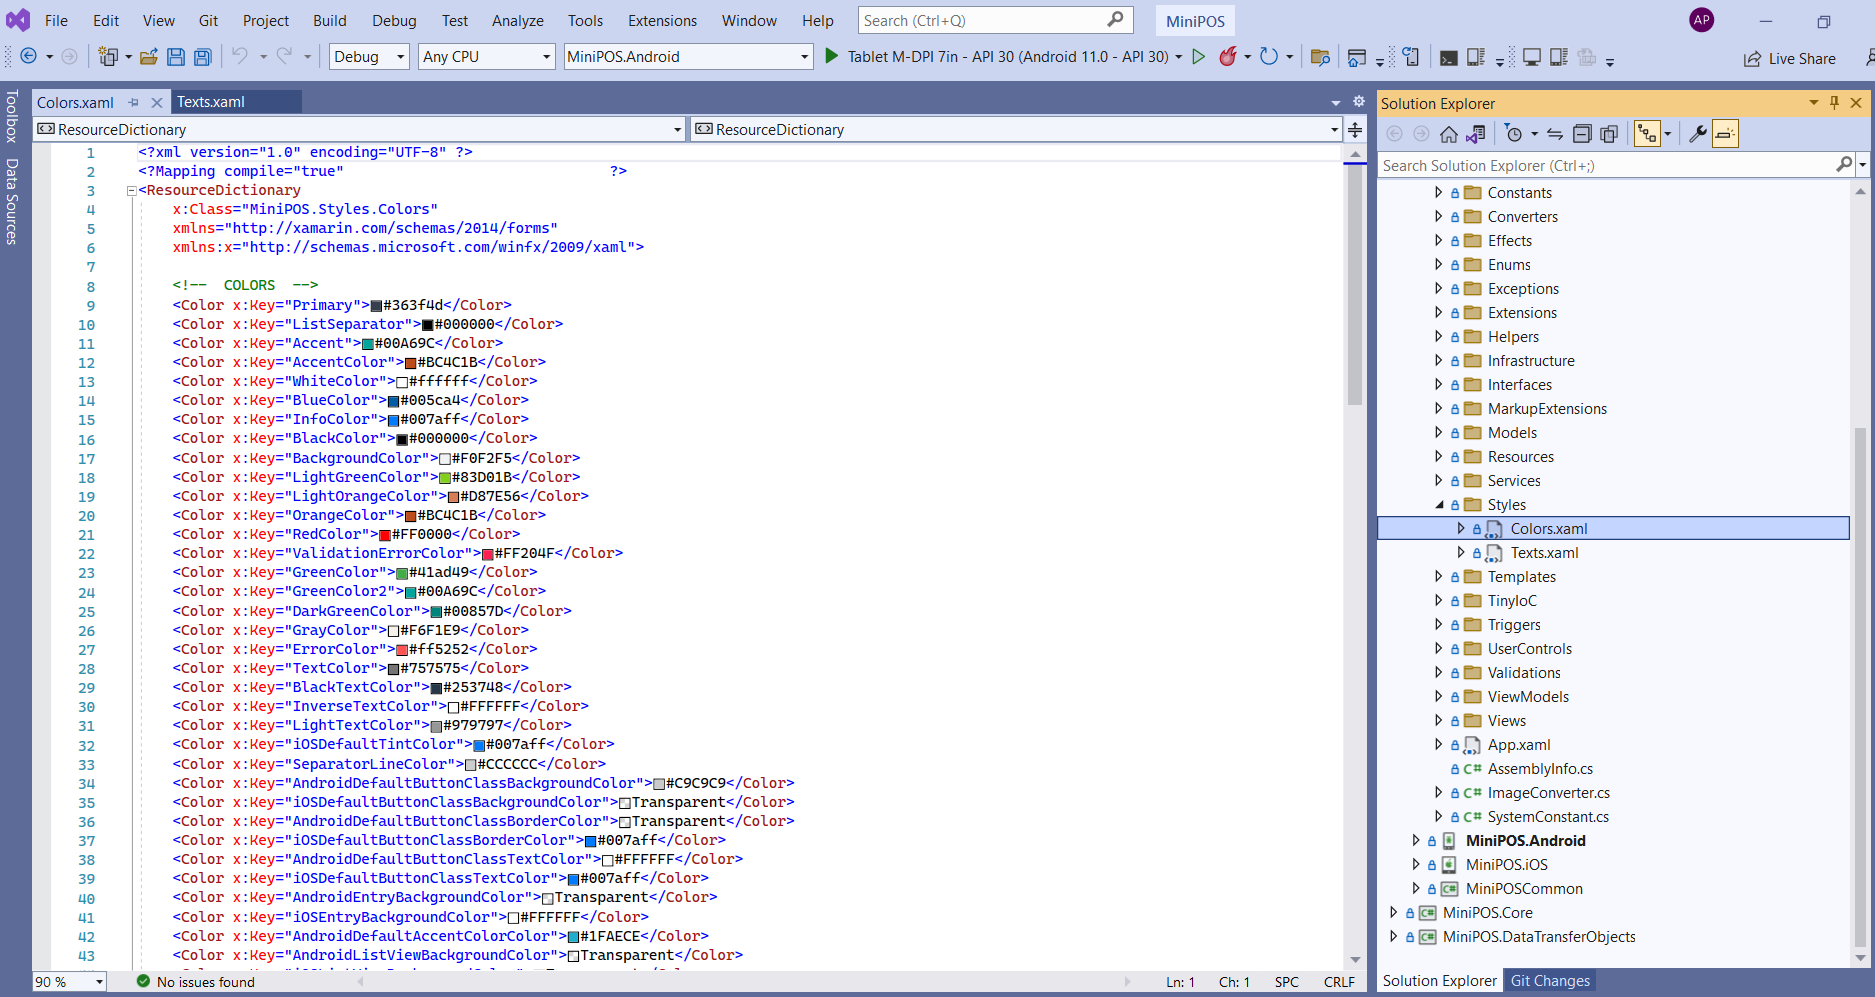
Expanse the MiniPOS > Styles folder, you will find Texts.xaml and Color.xaml files, let open these files and modify the values
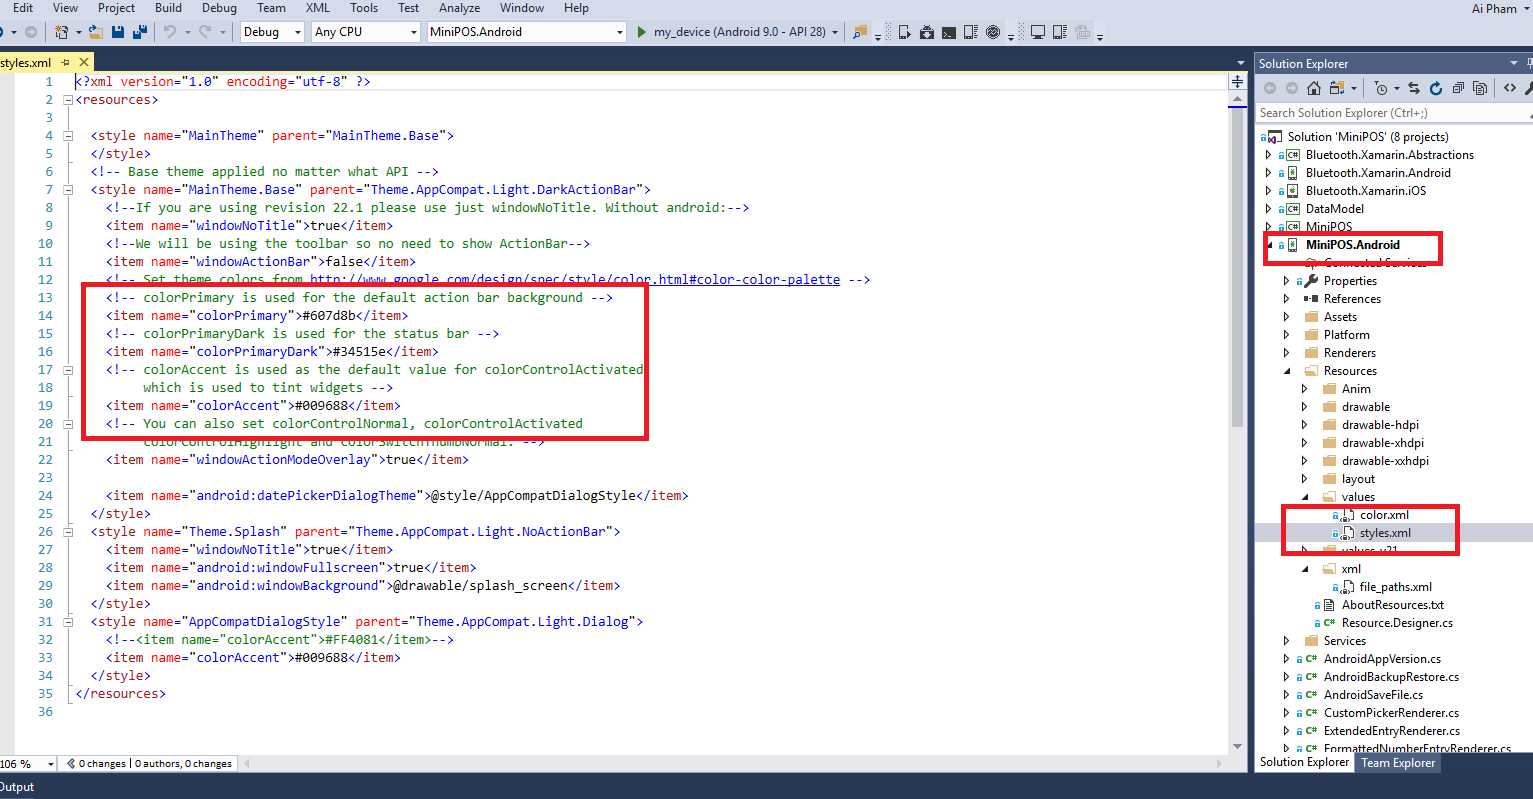
For Android application, Go to Resources > values folder > open styles.xml file and you will see all the xml file which is responsible for android status bar color
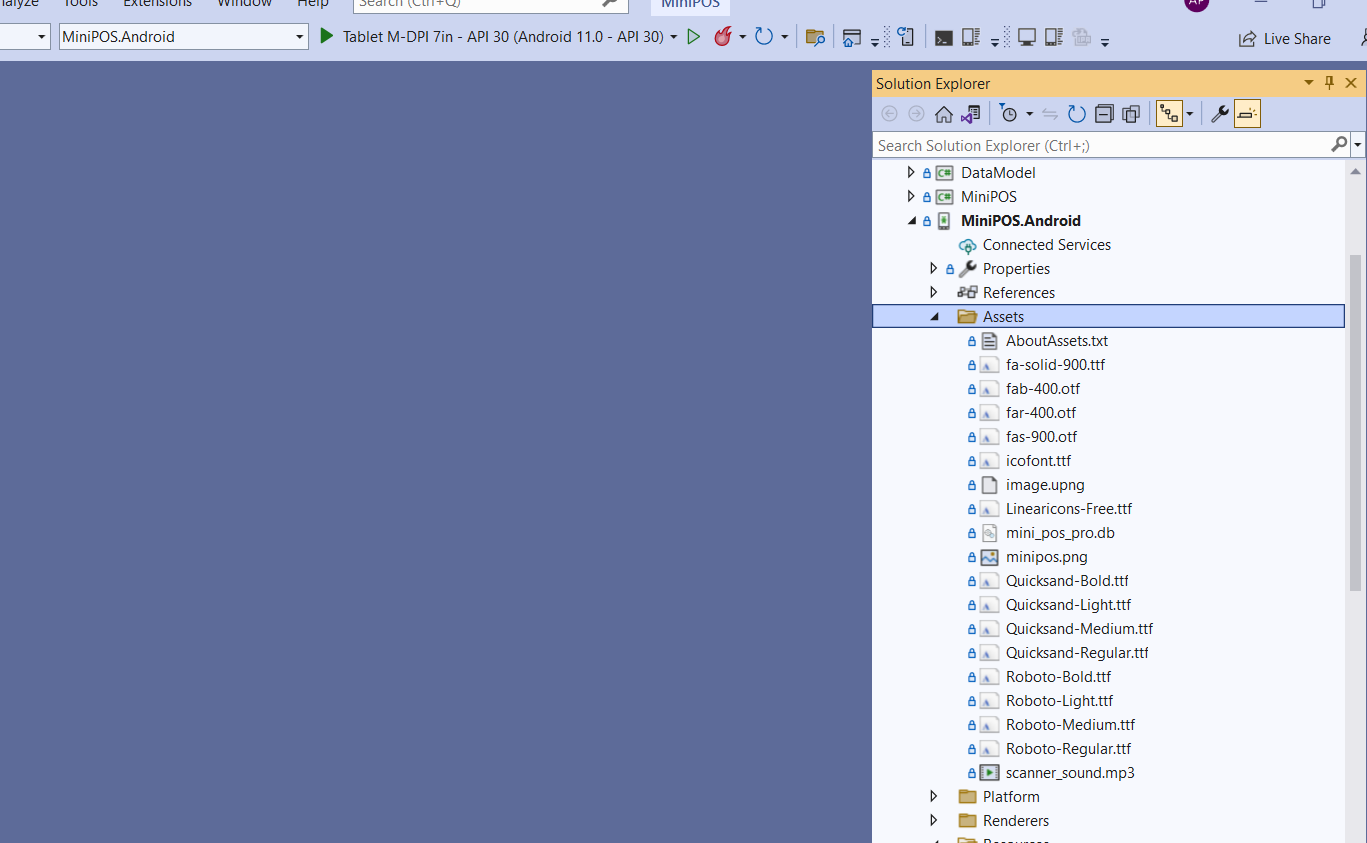
Expand the MiniPOS.Android.Assets folder you will see all fonts, another assets used in the app.
Change Logos & Icons and Images
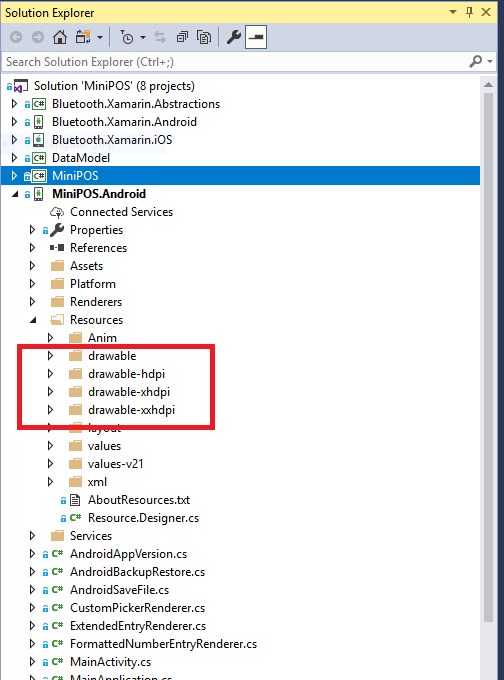
For Android, in the MiniPOS.Android project, expand the Resources you will find 4 main folders by the following names:
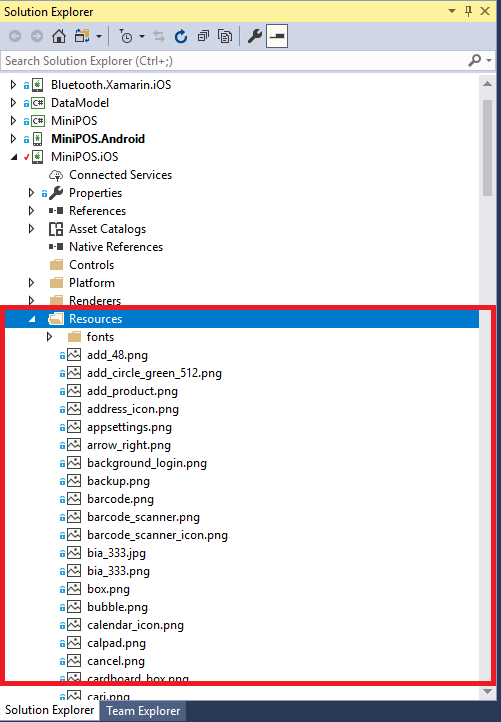
For iOS, in the MiniPOS.iOS project, expand the Resources you will find 4 main folders by the following names:
Change Application name & Package name
For Android app, to change application name, open MainActivity.cs file and change the variable bellow to your own Application name
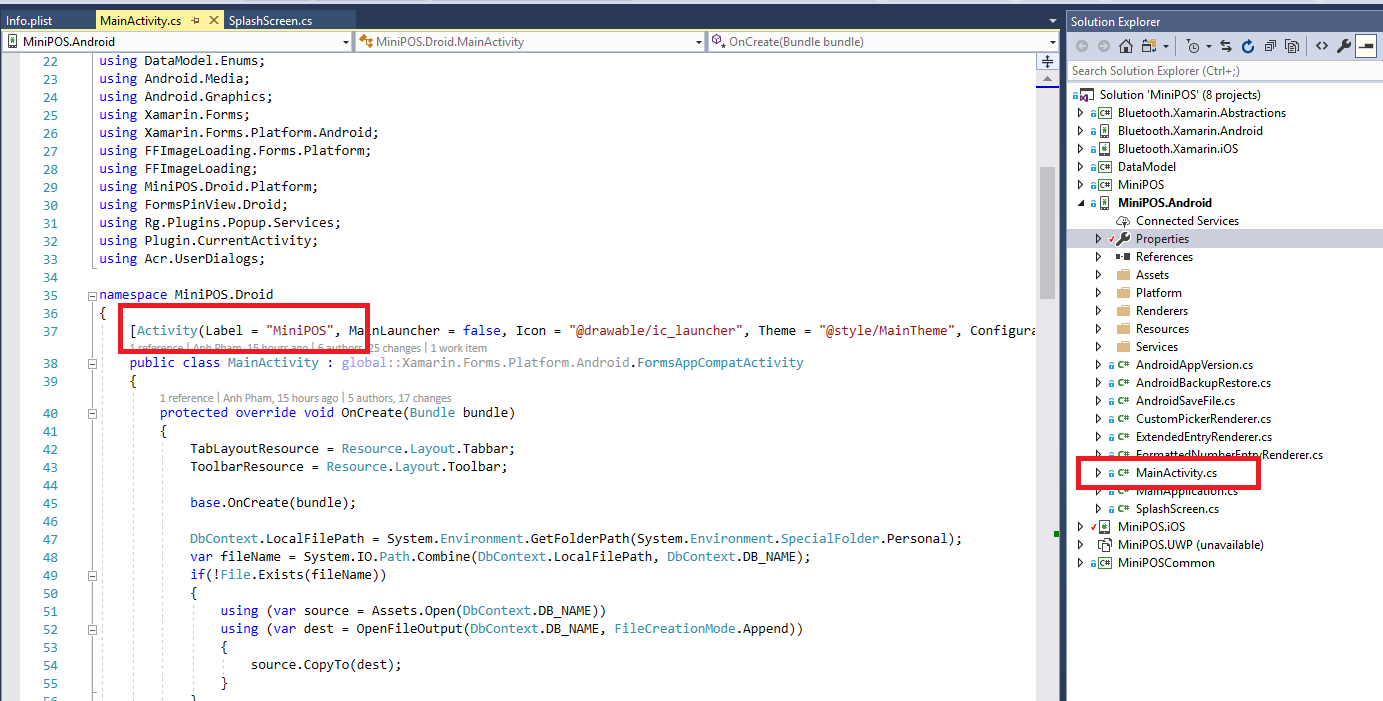
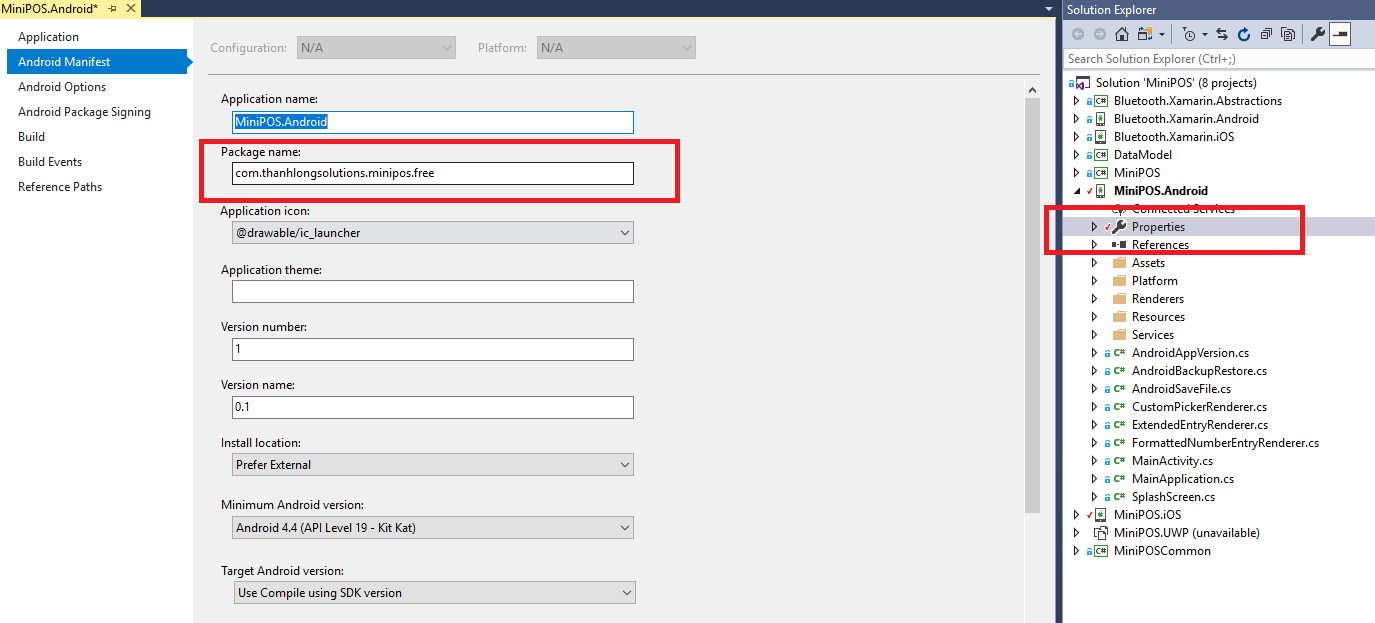
To change package name, double click on the project Properties > Android Manifest and change the package name value according to you.
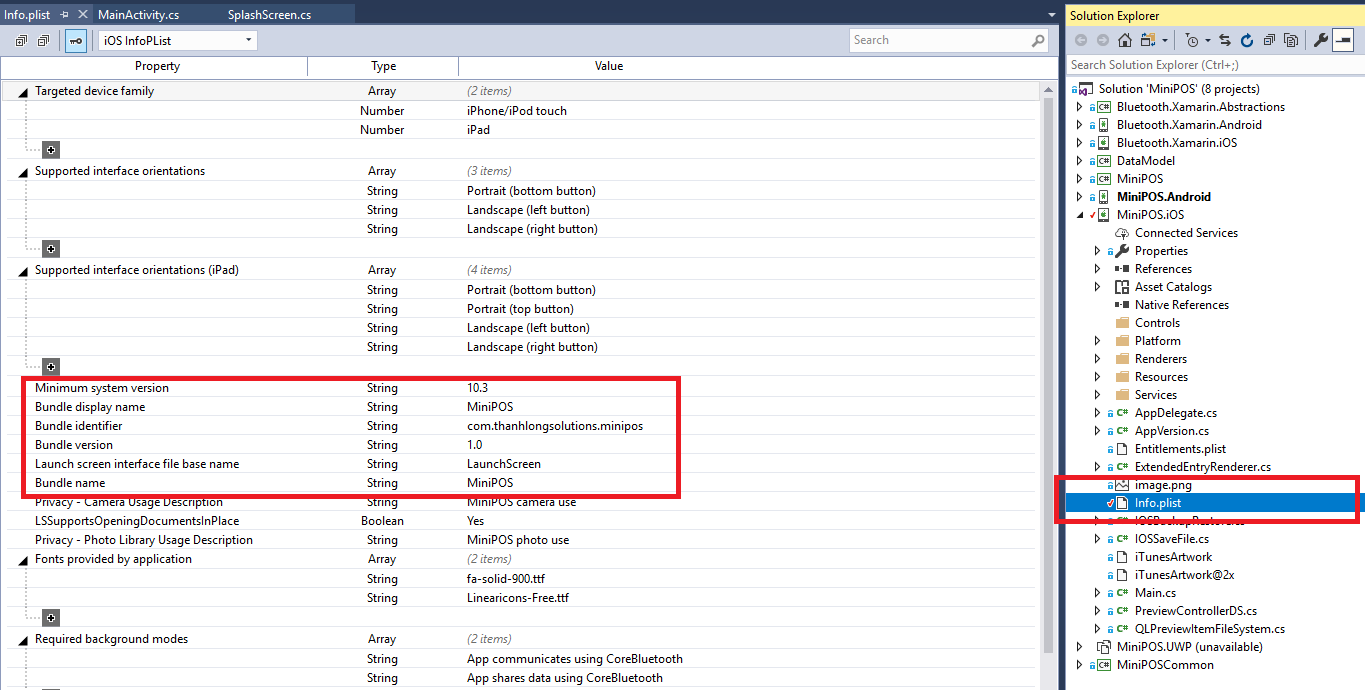
For iOS app, to change application name, double click on Info.plist file, change the value of Bundle display name and Bundle name as you want for the application name, same for Bundle identifier as the package name.
Multilinguals and Translations
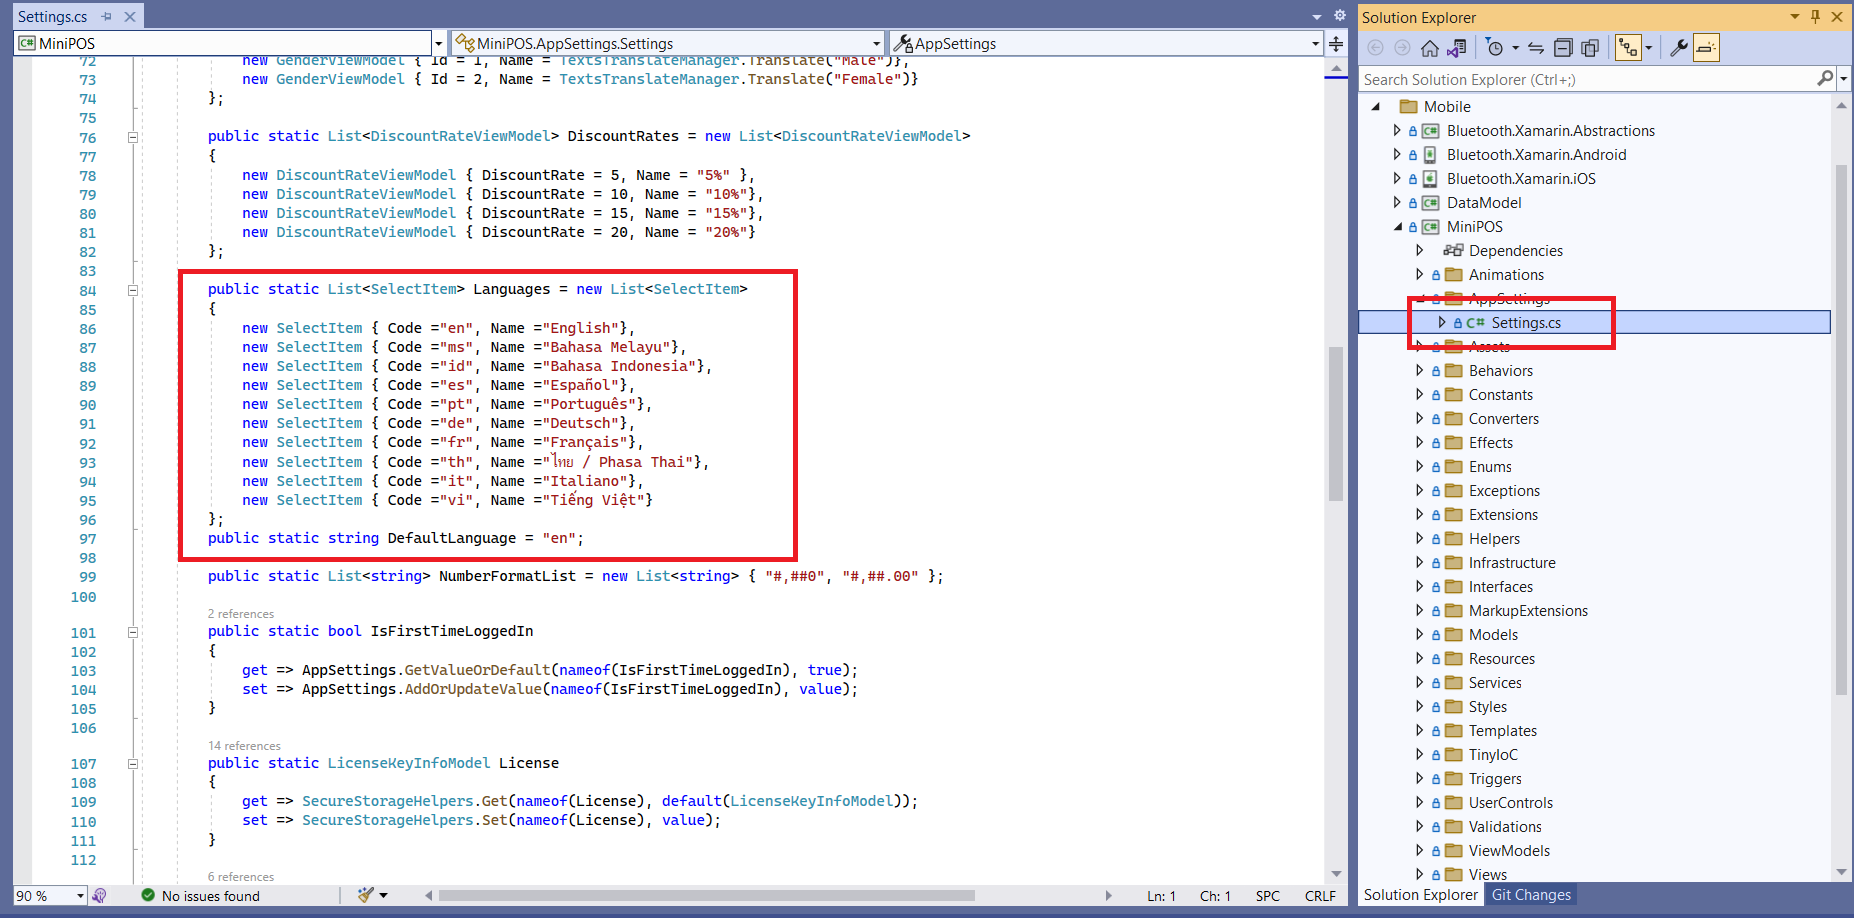
To add new language, open MiniPOS > AppSettings > Settings.cs file and add new line
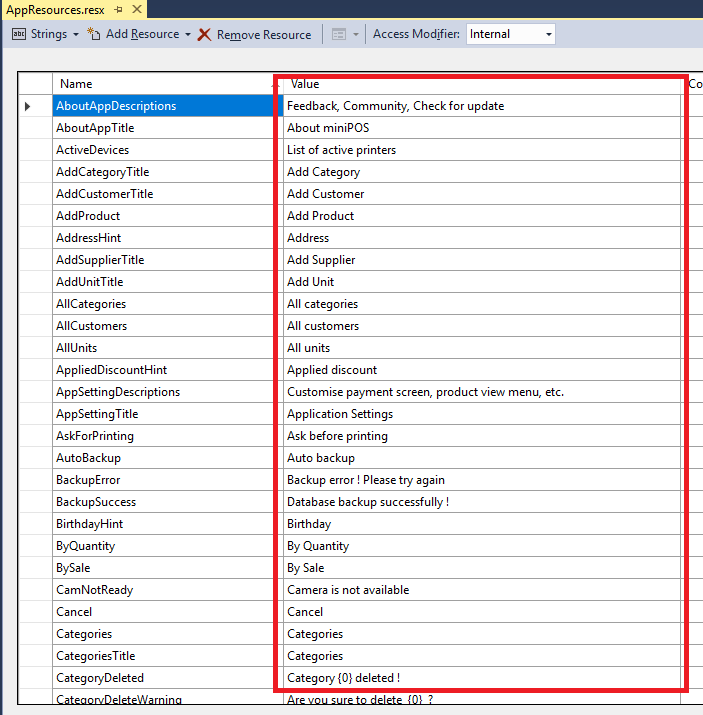
Open MiniPOS > Resources > Texts folder, you will see all translations resx files containing translation words:
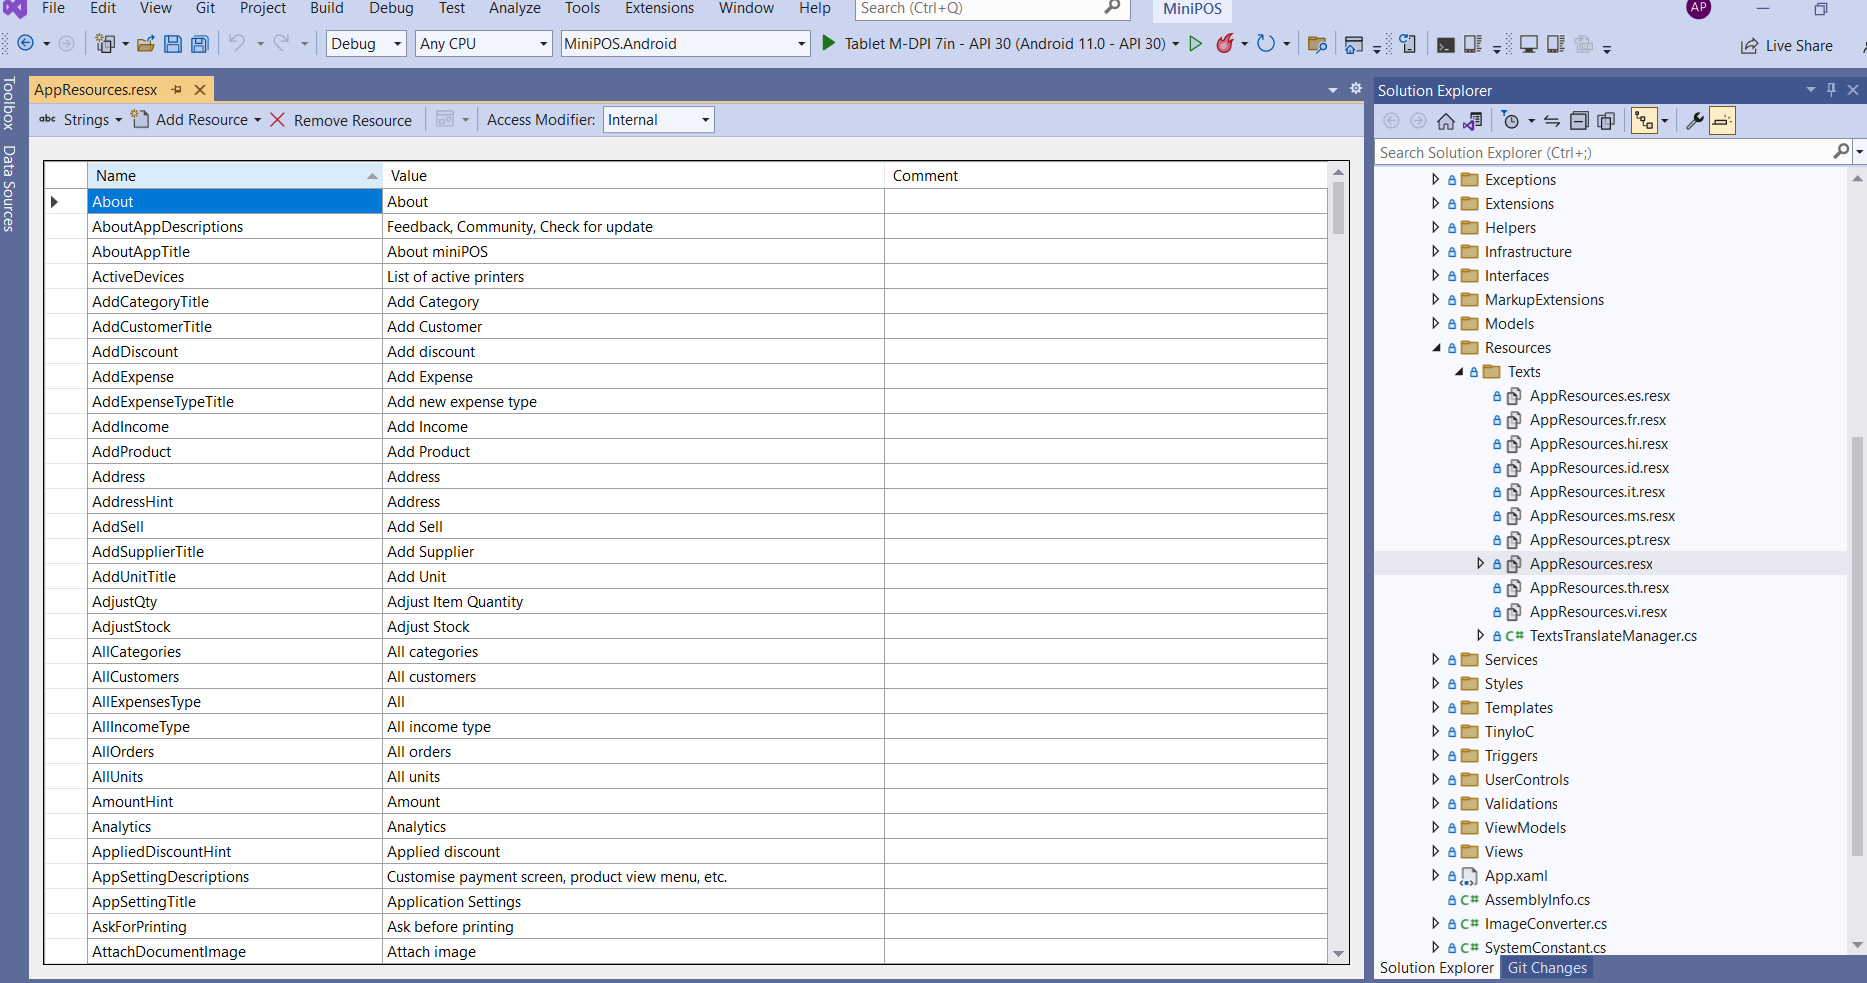
Add new translation file for new language you added, your new translation should be added here with following format: AppResources.Your-Language-Code.resx, simply open the new resx file and add your translation in the Value column of the table:
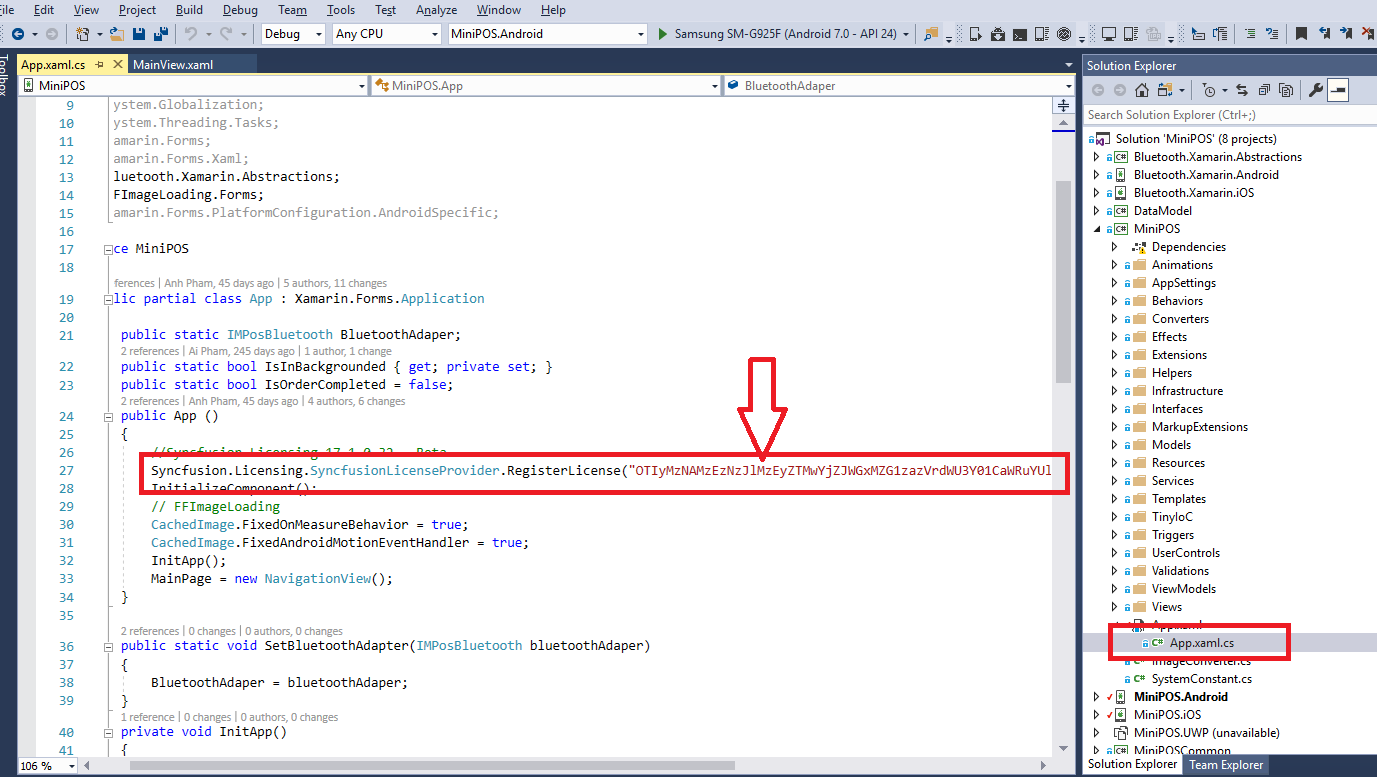
Change Synsfusion License key
MiniPOS uses awesome UI controls template from Syncfusion, it is commercial but also offers Community License, please refer to Syncfusion policy before you proceed. Once you registered a license, please change the string value in red border to your new license as below instruction:
Publishing Applications
1. Publish Web API Applications
Video Guide:
2. Publish Android Application
Video Guide: